When faced with heating problems, one of the first components to inspect is the thermostat. This seemingly simple device plays a pivotal role in regulating your home’s temperature and could be the culprit if your furnace isn’t turning on. A comprehensive check of the thermostat settings can often reveal the issue, saving you time and the cost of furnace repair.
Begin by ensuring that the thermostat is set to ‘heat’ mode. It’s a common oversight, especially after a season change, to have the thermostat set to ‘cool’ or ‘off.’ In ‘heat’ mode, set the temperature to a few degrees higher than the current room temperature to prompt the furnace to start. If there’s no response, it’s time to delve further into the settings and functionality.
Next, verify the accuracy of the temperature reading by comparing it with a separate room thermometer. If there’s a considerable discrepancy between the actual room temperature and the thermostat’s reading, recalibration might be necessary. Many modern thermostats allow for calibration through the settings menu, while older models might require manual adjustments or professional assistance.
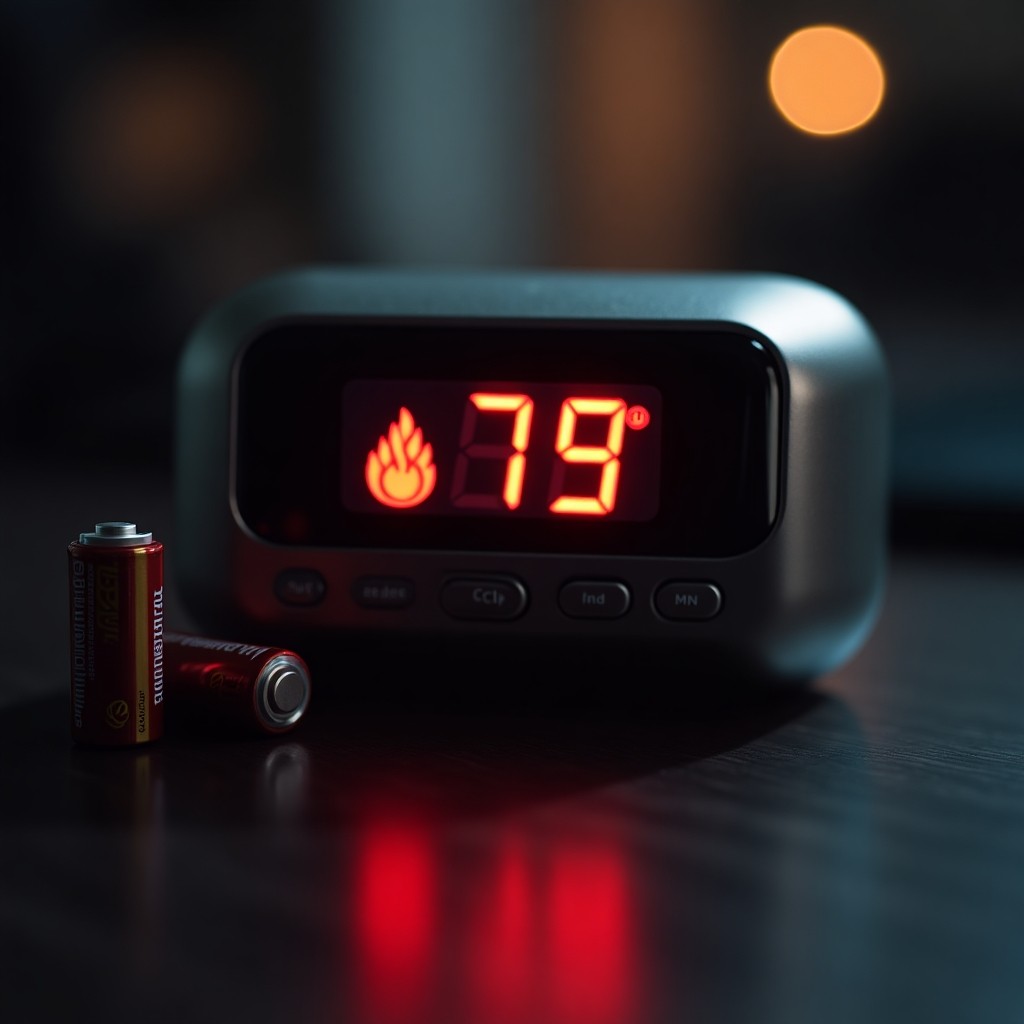
Check whether the thermostat has fresh batteries if it’s a battery-operated model. A weak or dead battery can lead to intermittent operation or a complete shutdown of the thermostat, leading to heating problems. Replacing the batteries is a simple fix that often resolves the issue.
For programmable or smart thermostats, delve into the schedule settings. It’s possible that a pre-set heating schedule conflicts with when you’re expecting the furnace to operate. Update any schedules that might be outdated or incorrectly set. Additionally, software updates for smart thermostats can fix bugs and improve functionality, so make sure the thermostat is running the latest firmware.
The wiring connections of the thermostat should also be inspected, especially if you have recently undertaken a DIY project involving the device. Loose or disconnected wires can disrupt the communication between the thermostat and the furnace, preventing proper operation. If you are not comfortable checking the wiring yourself, consulting an HVAC professional is advisable for safe and correct handling.
| Thermostat Checkpoints | Possible Actions |
| Mode setting | Ensure set to ‘heat’ |
| Temperature calibration | Compare with an external thermometer and recalibrate if necessary |
| Batteries | Replace if weak or dead |
| Programming | Review and update heating schedule |
| Wiring | Check for loose or disconnected wires |
By meticulously going through these HVAC tips for thermostat settings, you can potentially save yourself from unnecessary furnace repair costs and ensure that your system operates efficiently throughout the heating season.
power supply check
To ensure your furnace is properly powered and can start when needed, follow these steps:
1. Verify the Power Switch: Most furnaces have a dedicated power switch located on or near the furnace itself. This switch often resembles a standard light switch. Confirm that it is in the ‘on’ position. Sometimes, simple issues such as someone accidentally flipping the switch can prevent the furnace from operating.
2. Check the Circuit Breaker: Your furnace is connected to a circuit on your home’s breaker panel. Locate the correct circuit breaker for the furnace and check if it has tripped. If it has, reset it by switching it off, waiting a few seconds, and then turning it back on. A tripped breaker could indicate a more significant electrical issue, so if it continues to trip, consider contacting a professional.
3. Inspect the Fuse Box: For homes with a fuse box instead of a circuit breaker, locate the fuse controlling the furnace and inspect it for any signs of burns or breakage. Replace it with a new fuse of the correct amperage if necessary. Remember that a blown fuse might suggest an underlying problem, so consult with an HVAC technician if the problem persists.
4. Examine the Power Cord: Visually inspect the power cord of the furnace for any signs of damage, fraying, or disconnection. Make sure it is securely plugged into a functioning outlet. Consider replacing the cord if you notice any severe damage.
5. Test the Electrical Outlet: Use another device, such as a lamp or phone charger, to confirm that the outlet is working correctly. If the outlet is dead, try resetting it, if equipped with a reset button, or call an electrician to investigate further.
6. Review Automated System Errors: If your furnace is connected to a home automation system or a smart thermostat, ensure that there are no error messages or connectivity issues. Sometimes, these systems can malfunction and impact the operation of the HVAC system.
By thoroughly examining the power supply and addressing any electrical issues, you can often resolve heating problems without immediate furnace repair. These HVAC tips help ensure your furnace has a stable power source, which is crucial for its operation. If problems persist, seeking professional assistance may uncover underlying electrical problems requiring expert resolution.
pilot light inspection
When your furnace is not turning on, one critical component to inspect is the pilot light. This seemingly small part of the heating system plays a significant role in igniting the burners, which, in turn, heat your home. Without a properly functioning pilot light, your furnace won’t operate, potentially causing significant inconvenience during colder months. Understanding how to inspect and address pilot light issues can save you from unnecessary furnace repair and alleviate heating problems.
First, access the furnace’s control panel to locate the pilot light or electronic ignition system. For older gas furnaces with a standing pilot light, ensure that it is lit. If it’s extinguished, follow the manufacturer’s guidelines for relighting it. Typically, this involves turning the gas valve to ‘off,’ waiting a few minutes for the gas to dissipate, and then using a match or lighter to reignite the pilot while keeping the reset button pressed. Exercise caution during this process to prevent any gas leakage.
If the pilot light does not stay lit, check for potential blockages. Dust and debris can obstruct the pilot orifice, hindering the gas flow necessary for maintaining a flame. Use a small needle to gently clear any obstructions from the orifice. Also, ensure the surrounding area is clean to avoid further dirt build-up that could affect performance.
For furnaces equipped with an electronic ignition system – common in newer models – inspect the ignition sensor or ignitor for any signs of wear or damage. These components are responsible for creating the spark or activating the heating elements needed to ignite the burners. A faulty ignition sensor may require cleaning or replacement, which potentially restores proper function without engaging in more extensive furnace repair.
Another common issue involves the thermocouple, a safety device that senses the pilot light’s presence and enables the gas valve to remain open. If the pilot repeatedly goes out, test the thermocouple for failure. It might need realignment or replacement. A properly functioning thermocouple will ensure the pilot light remains stable, keeping the furnace operational.
Lastly, check for any gas supply issues if the pilot light isn’t receiving sufficient fuel. Ensure that the gas valve is fully open and that there is no disruption in the gas line. If a gas supply problem is suspected, it’s crucial to contact your gas provider or a professional HVAC technician to investigate further.
By thoroughly inspecting the pilot light and related components, many common heating problems can be resolved quickly. These practical HVAC tips allow for efficient troubleshooting, minimizing downtime and preventing potential discomfort during winter months. If troubleshooting does not resolve the issue, it’s wise to seek professional assistance to avoid exacerbating any underlying problems.
filter and airflow
Filters and airflow are critical components of your furnace’s operation and often overlooked when diagnosing heating problems. Ensuring that air can move freely through your system can significantly impact its efficiency and prevent common issues that might otherwise lead to unnecessary furnace repair.
Begin by inspecting the furnace filter. Over time, filters accumulate dust, debris, and other airborne particles. A clogged or dirty filter restricts airflow, forcing the furnace to work harder than necessary, and can ultimately cause it to shut down prematurely. To avoid this, check the filter monthly during the heating season and replace it as needed. Generally, replace disposable filters every 1-3 months, depending on your model and environment, while permanent filters should be cleaned regularly according to the manufacturer’s guidelines. Trustworthy HVAC tips suggest that maintaining a clean filter not only enhances airflow but also improves indoor air quality, which is particularly beneficial for those with allergies or respiratory issues.
In addition to the filter, assess the system’s vents and registers throughout your home. Ensure that these are fully open and unobstructed by furniture, carpets, or curtains. Blocked vents reduce the system’s efficiency and can cause uneven heating, making some areas of your home colder than others. Occasionally, registers can inadvertently be closed, especially in homes with children or pets. Make it a habit to regularly walk through your home and inspect the vents to guarantee optimal airflow.
It’s also crucial to look at the furnace’s blower motor and fan. These components play a key role in circulating air. If you notice unusual noises or inadequate airflow, there could be an issue with the motor or fan. Basic maintenance, such as cleaning the fan blades and lubricating the motor bearings, can help in mitigating these issues. However, if these parts seem worn out or damaged beyond what basic maintenance can fix, consulting a professional for furnace repair might be necessary to prevent further complications.
Ductwork integrity is another factor influencing airflow. Leaks or obstructions in the duct system can lead to significant energy loss and increased strain on the furnace. Conduct a visual inspection of accessible ductwork where possible, checking for signs of wear, gaps, or any blockages. Sealing and insulating ducts can greatly improve efficiency and ensure the warm air reaches its intended destination. If the ductwork in your home is extensive or difficult to access, consider professional assistance to conduct a comprehensive inspection and duct sealing.
Following these practical HVAC tips concerning filters and airflow not only helps to avoid common heating problems but also extends the lifespan of your furnace, enhancing its performance throughout the entire heating season.
professional assistance
When your attempts to fix the furnace on your own do not yield results, it may be time to seek professional assistance. Engaging a qualified HVAC technician can be advantageous for a detailed inspection and diagnosis of complex issues that DIY approaches fall short of fixing.
A professional technician brings specialized knowledge and experience to pinpoint problems that are not immediately visible. They can systematically assess the furnace, addressing intricate issues such as faulty gas valves, complex wiring defects, or malfunctioning blower motors. These components can prove challenging to diagnose and often require specific tools and expertise.
Professional HVAC companies also offer comprehensive service packages that include routine maintenance. Regular servicing by a licensed technician ensures that your system operates at peak efficiency, reducing the likelihood of unexpected breakdowns and prolonging the life of the furnace. They can perform critical maintenance tasks such as cleaning internal components, adjusting burner flames, and testing safety controls, all of which contribute to safer and more reliable heating.
Another benefit of professional services is the peace of mind that comes with knowing your furnace is in expert hands. Professionals can provide valuable advice and suggestions for future-proofing your heating system, incorporating the latest HVAC tips and technologies to enhance energy efficiency and comfort.
Additionally, most HVAC technicians have access to up-to-date training and education, keeping abreast of new compliance codes, advanced equipment standards, and cutting-edge repair techniques. This ensures that any furnace repair aligns with the latest industry standards and best practices.
For issues related to obtaining replacement parts or making upgrades, HVAC technicians can source the necessary components that are compatible with your specific model, ensuring quality and performance. They also offer warranties on parts and labor, providing an extra layer of protection for your investment.
In summary, while troubleshooting furnace issues yourself is commendable and can resolve many common heating problems, reaching out to a professional service allows for accurate diagnosis and timely repair. This not only restores warmth to your home efficiently but also safeguards the longevity and reliability of your furnace.
Conclusively, methodically addressing common issues such as thermostat settings, power supply, pilot light, filter and airflow concerns, and knowing when to turn to professionals, maximizes your furnace’s functionality. Employing these HVAC tips will not only enhance the performance of your system but also ensure a warm and comfortable home environment throughout the colder months.
